



All Your Sources. One Cisco Panel
Use LARA Wizard to turn Lightware UCX switchers or UCX TPX extender pairs into a Cisco room hub with Room Navigator source, lighting, and display control - all in a ready-to-upload LARA configuration.
Configure Cisco Rooms with LARA Wizard
Cisco codec typically supports sharing from a single laptop, while lights and displays often require a separate control system or remote controls. The Cisco Room option in LARA Wizard covers both needs. A Lightware device switches up to six sources and handles room control, while users operate everything from the Cisco Room Navigator they already use for calls.
Cisco Codec Only
With Lightware and LARA Wizard

One shared BYOD laptop

Up to six sources: laptops at the table, Room PC and ClickShare at the display
No way to choose between sources
One press on the Cisco Room Navigator selects the source
No USB-C input for laptop charging A separate control system, or remotes on the table, for lights and displays
USB-C charging up to 100 W keeps laptops powered Room Control page on the same Navigator for lights and displays
Control system code to write and maintain
Seven guided steps in the Wizard, no code required
See It in Action
The video walks through a real Cisco room from the initial challenge to the finished configuration: table and display sources, all seven Wizard steps shown on real screens, and Room Control on the Navigator.
Features
Up to Six Sources
Guest laptops at the table over HDMI or USB-C with up to 100 W charging, plus fixed sources at the display, such as the Room PC or a ClickShare base.
One-Press Source Selection
Each source gets a button on the Cisco Room Navigator home screen, with the name the installer gives it.
Both Ends Switch Together
In extender setups, one press switches the transmitter at the table and the receiver at the display.
Room Control
Lights, display power, mute and volume on the same Navigator, with up to six controls chosen by the installer.
Display Follows the Codec
When this option is on, the display switches on as soon as a call starts, with no button to press.
Fits the Room's Panel
Name the Room Control panel, choose where it sits on the Navigator, and pick its button colour.
Switch Everything With One Tap
Users don’t need to think about where a source is connected. A single press on the Navigator routes the selected source through the Lightware devices to the Cisco codec so it appears on the room display and for remote participants.
-
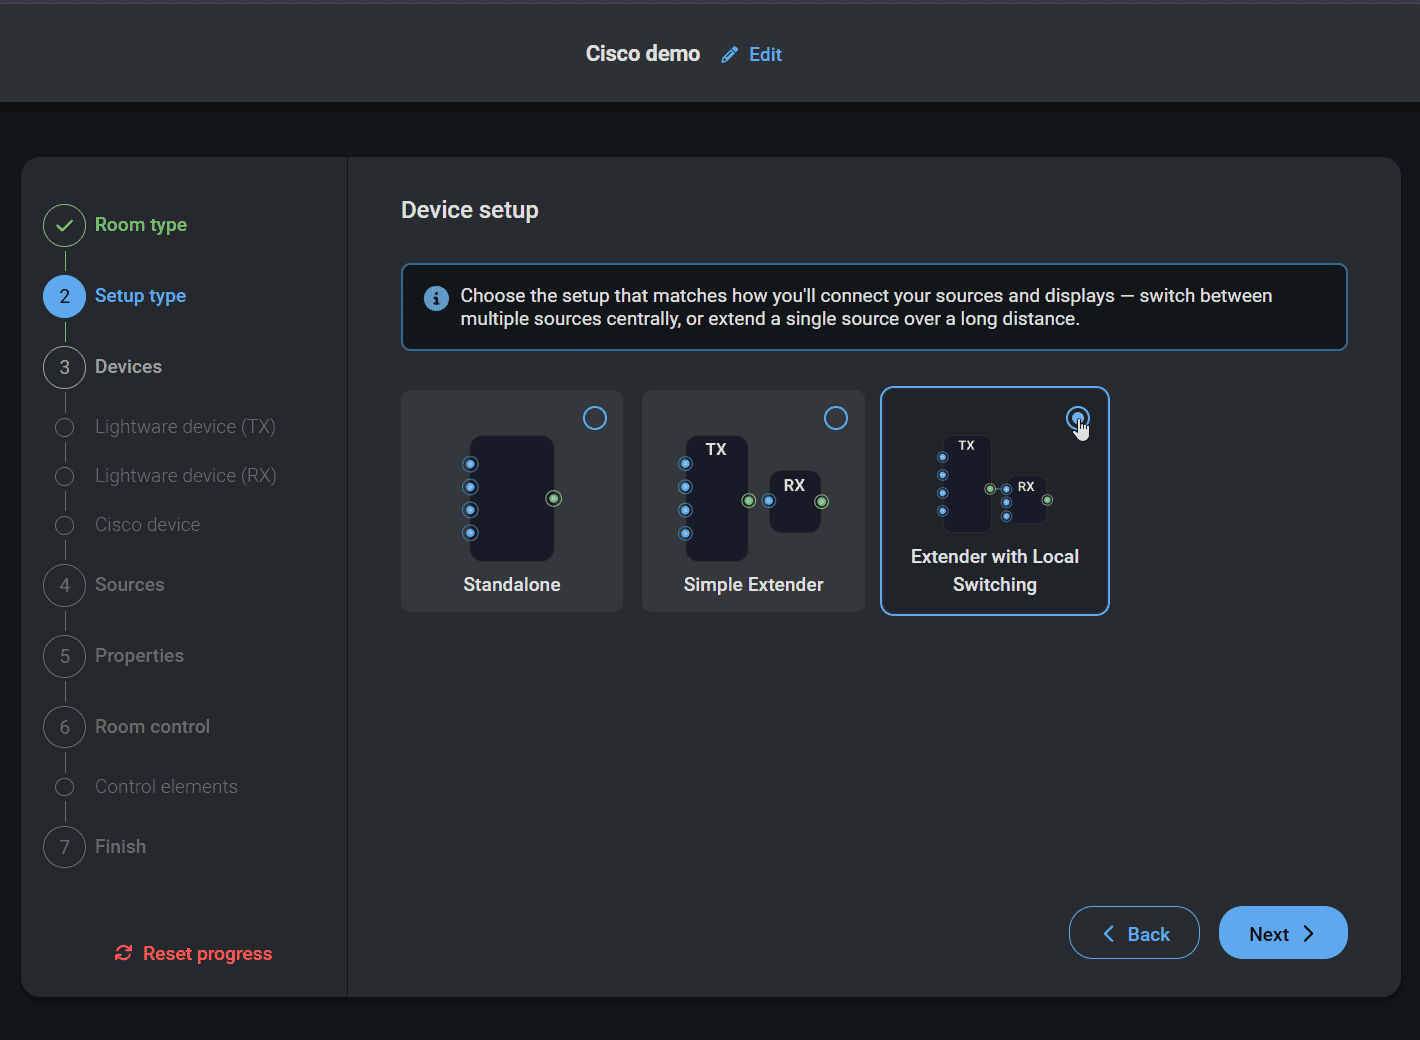
Three setups: a standalone UCX, or a UCX TPX extender with a basic receiver or with a receiver that has local inputs.
-
Fixed sources at the display switch locally on a receiver with local inputs. Without local inputs, those sources connect to the transmitter or to the switcher alongside the laptops.
-
Manual or automatic: the installer chooses whether users switch sources manually or the system switches automatically.
-
Laptops charge: the USB-C inputs deliver up to 100 W over the same cable that carries the video.
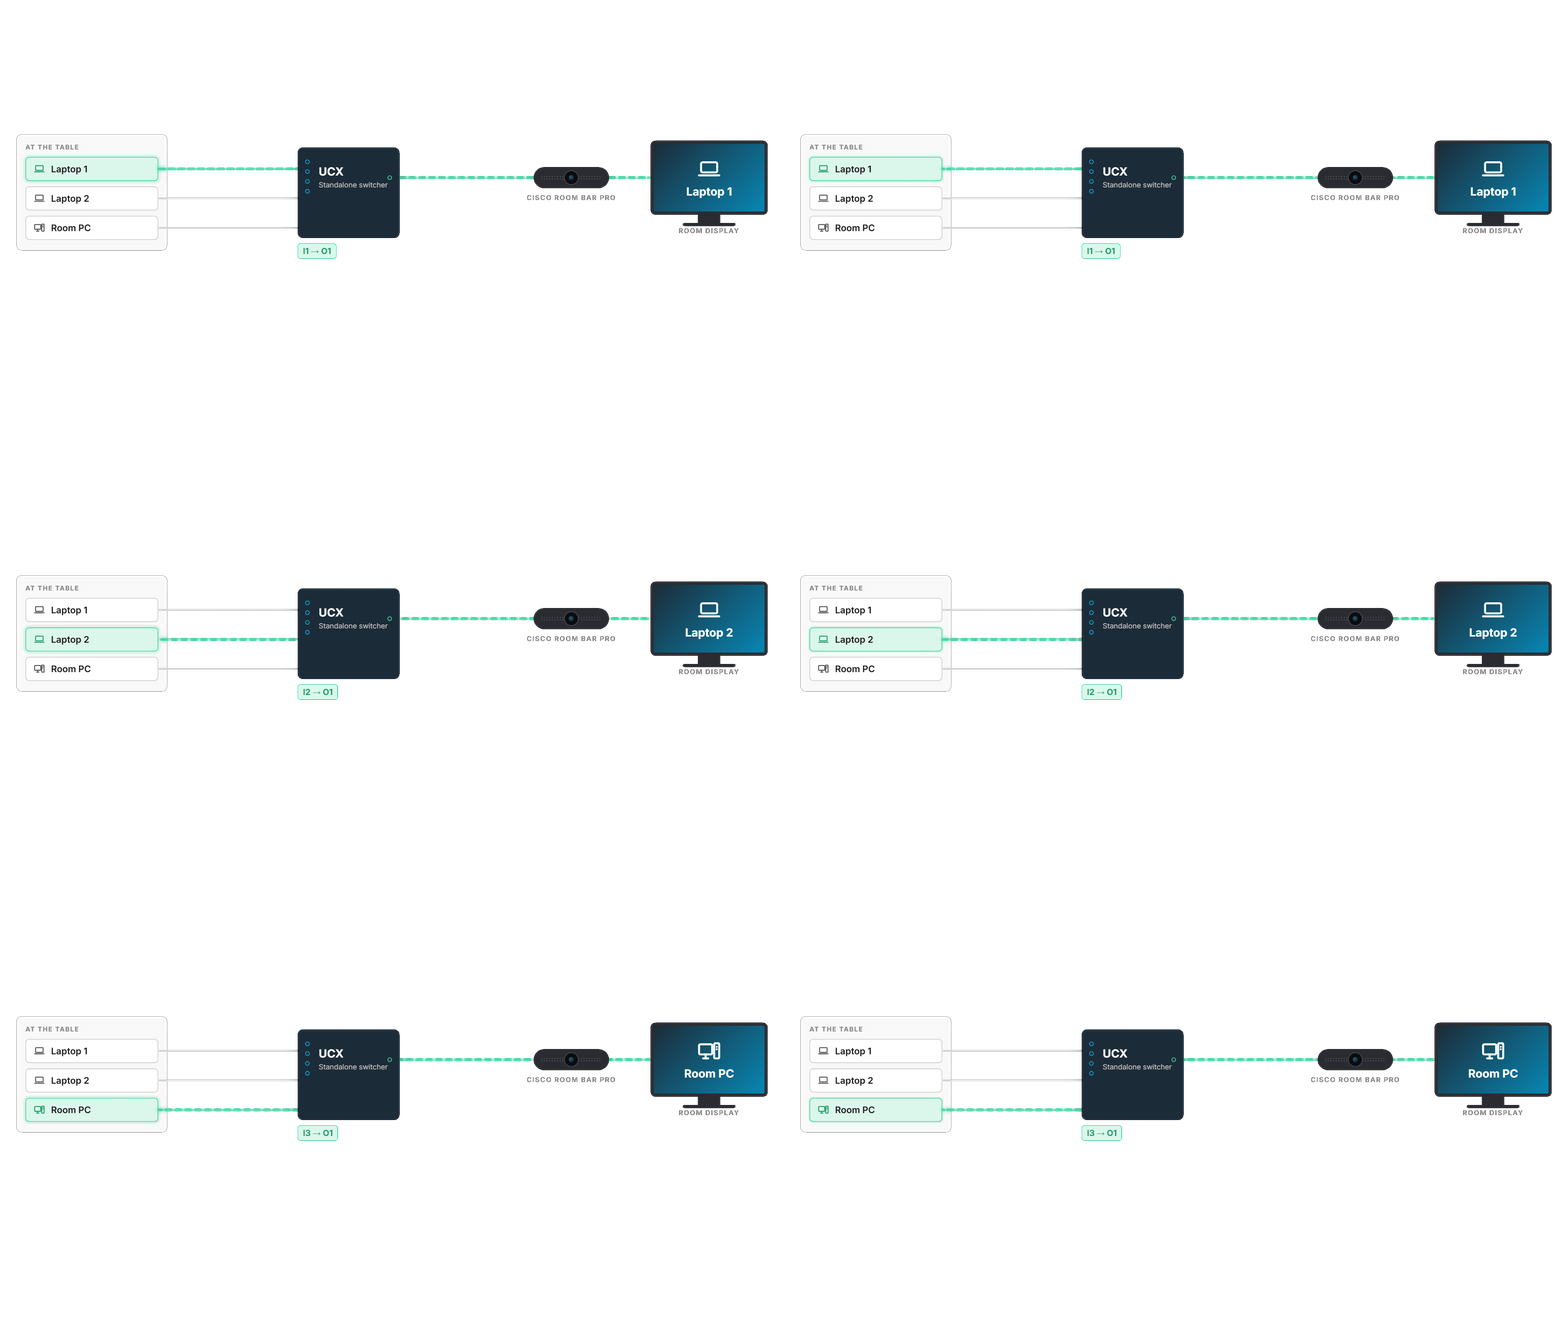
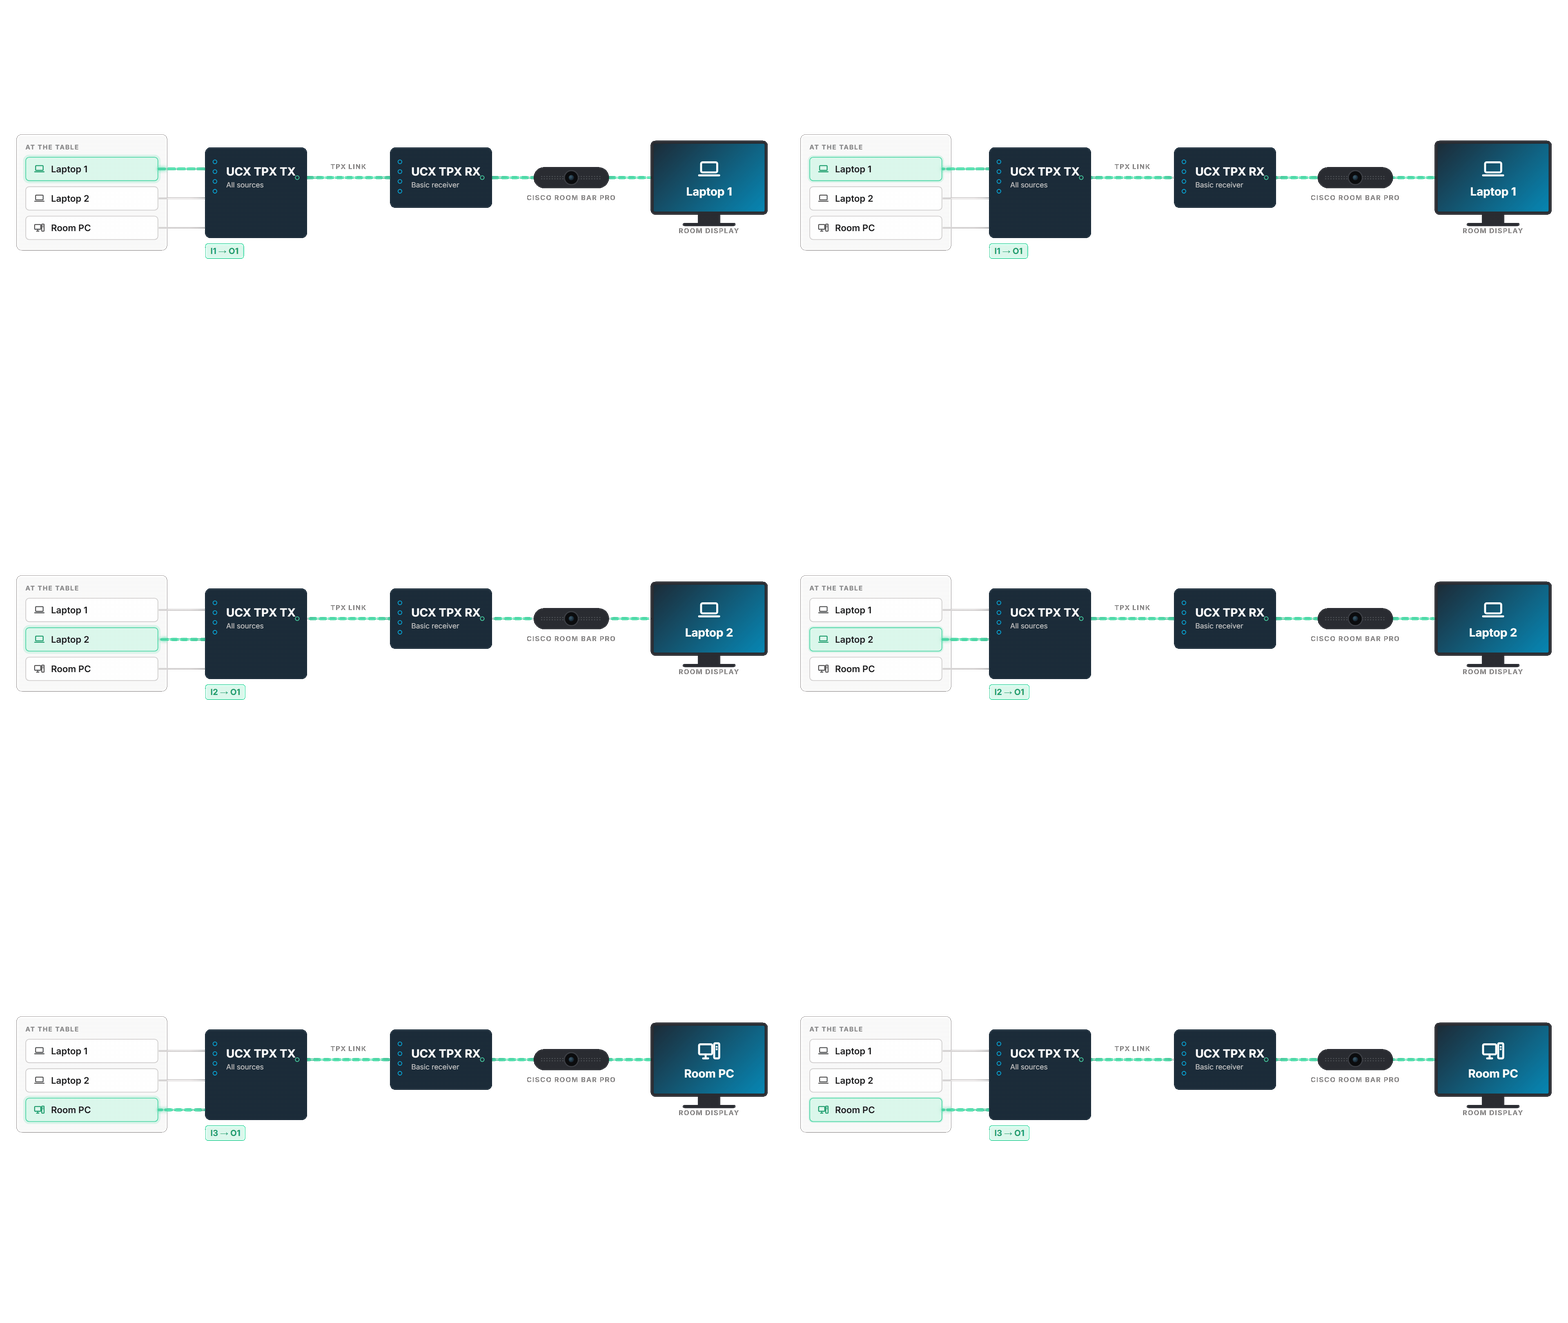
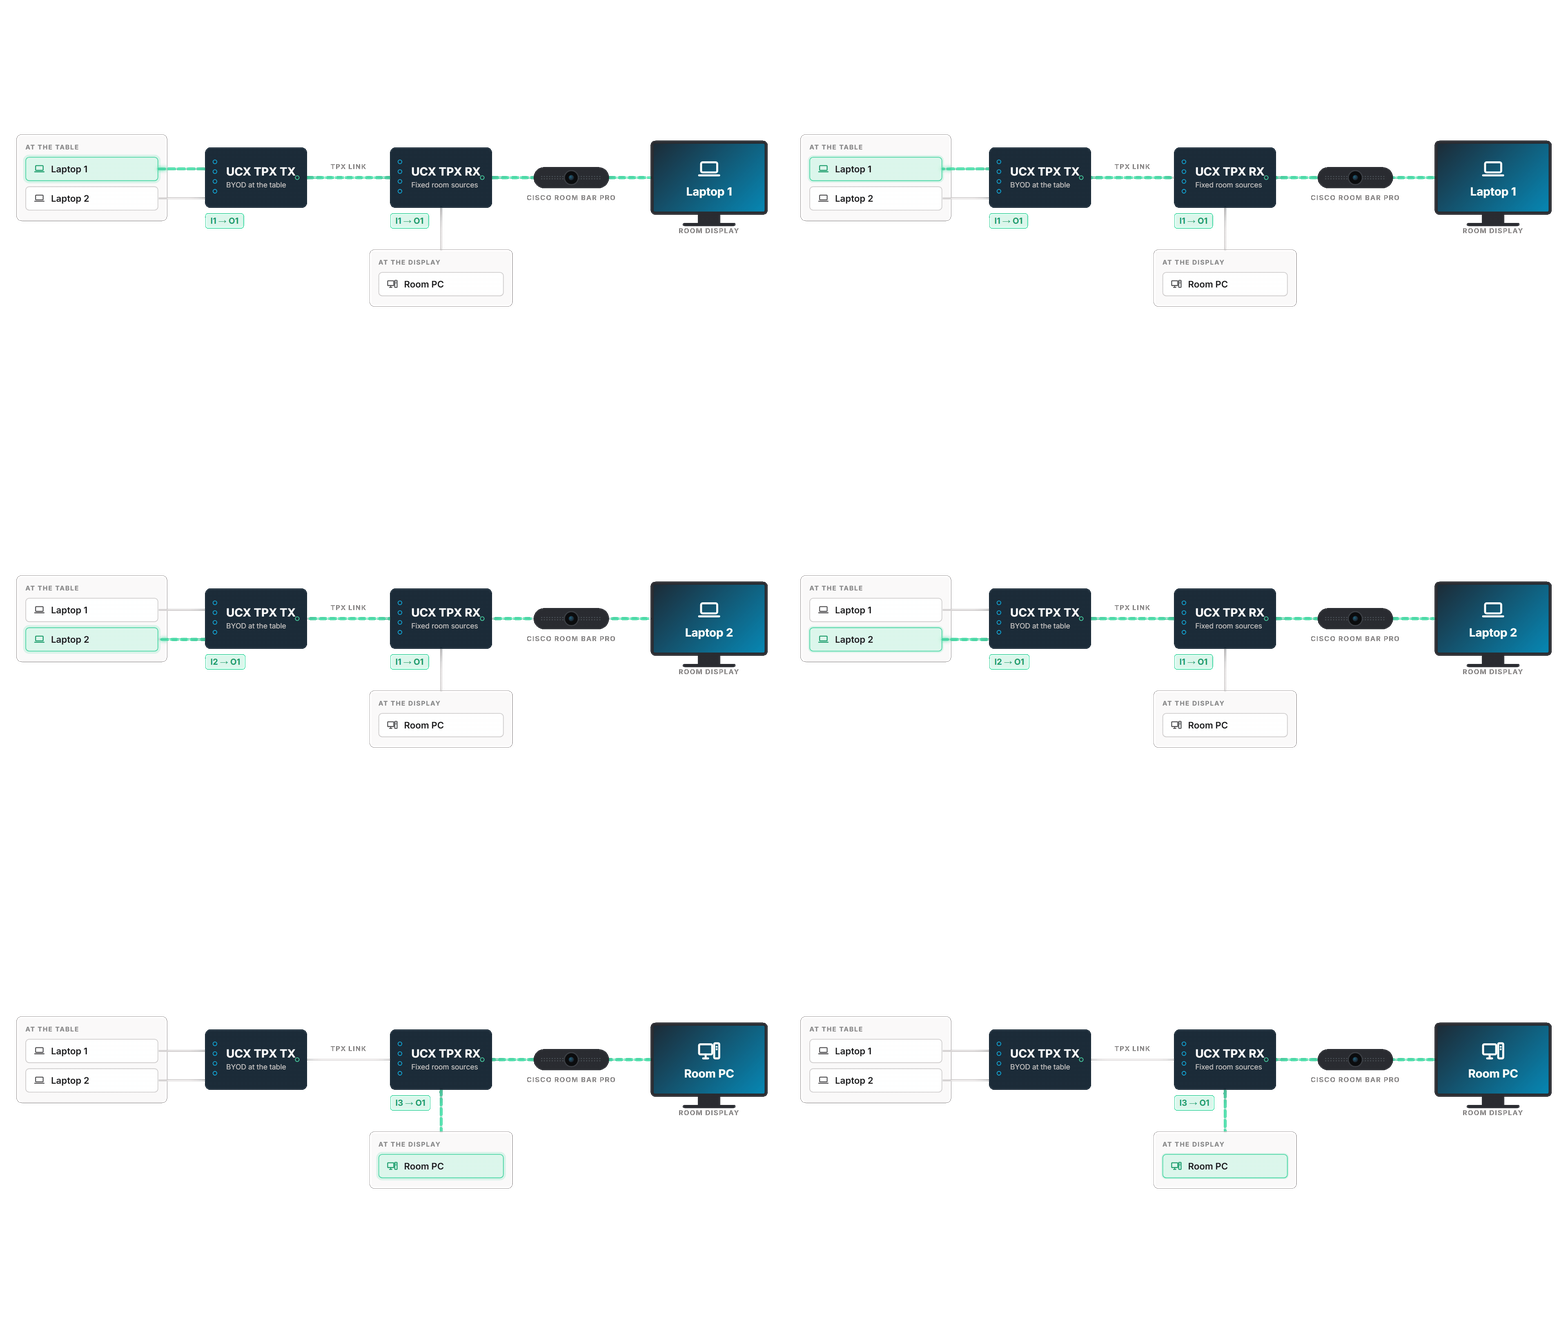
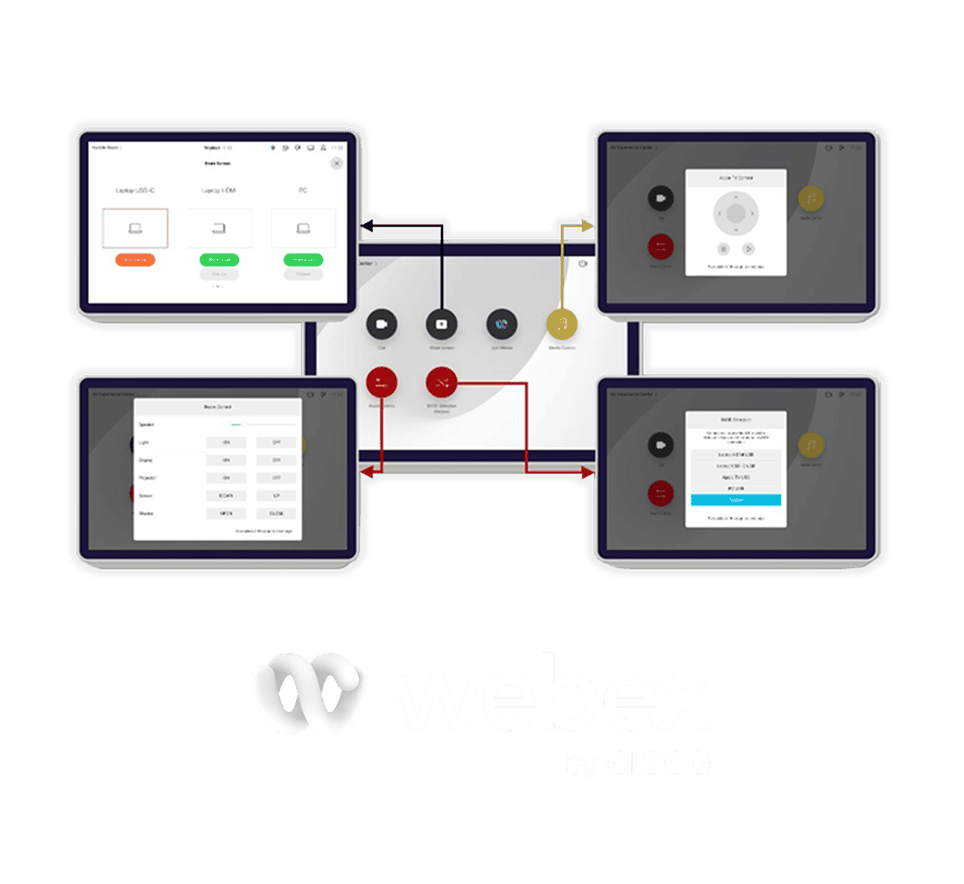
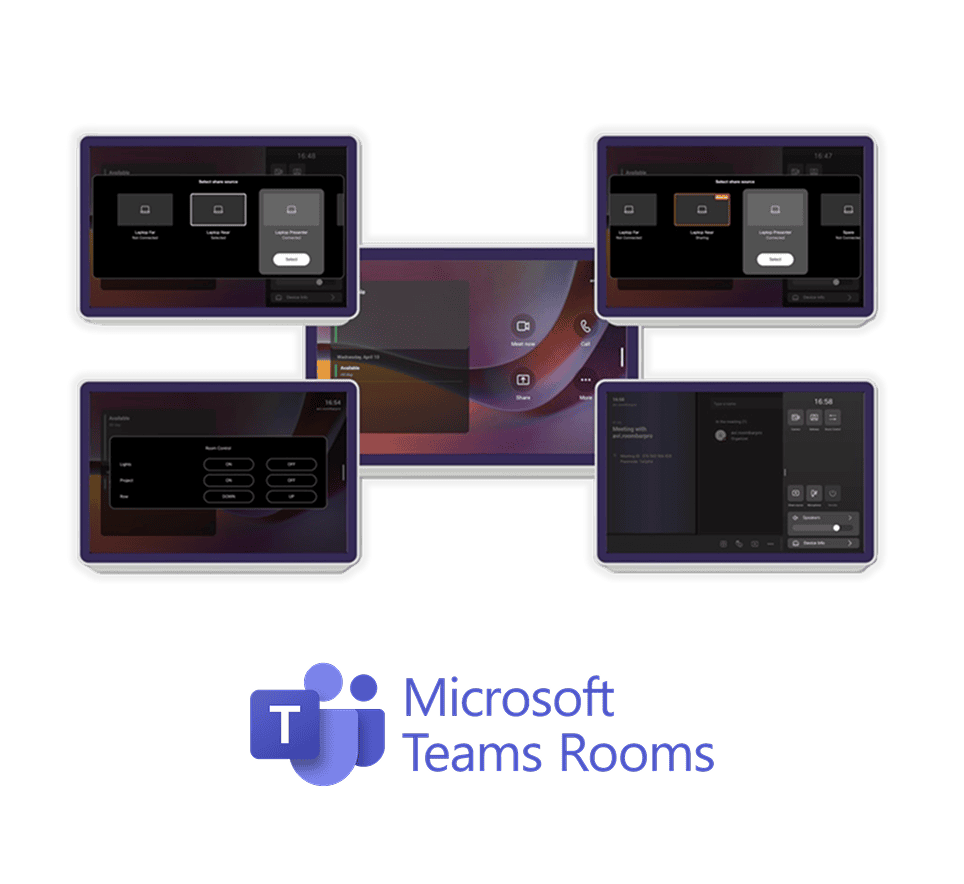
Room Control Without Extra Touch Panel
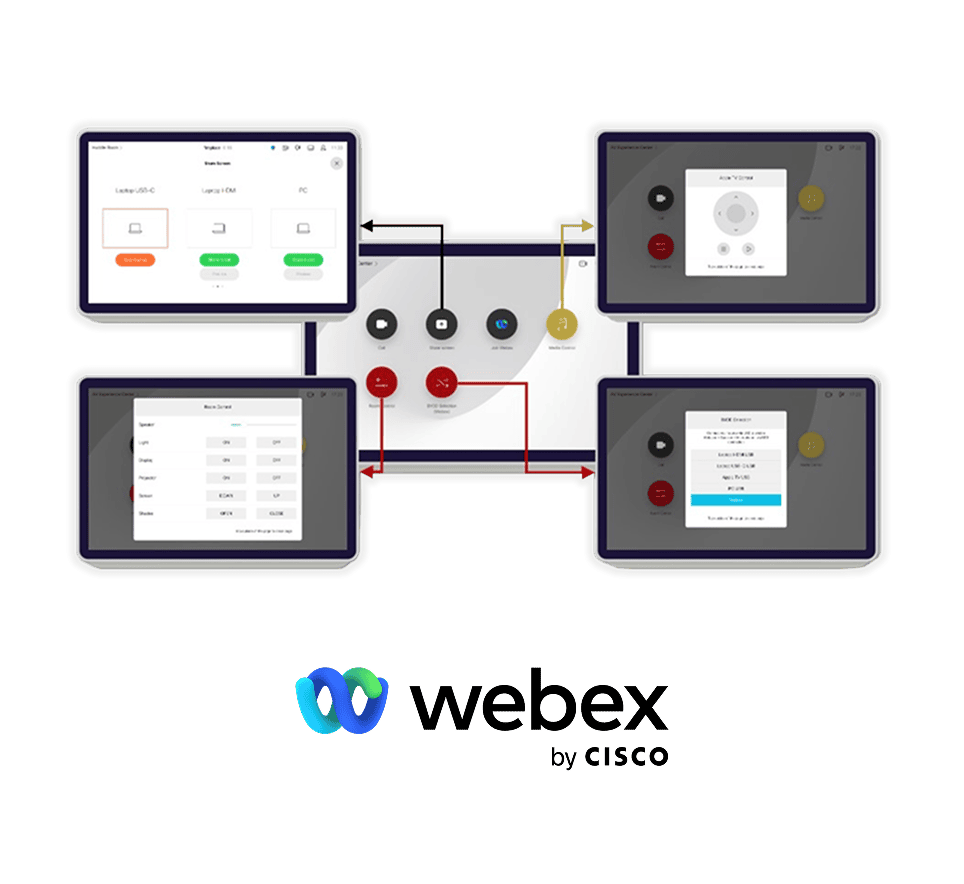
The same Lightware device that switches sources can also control the room. LARA runs on the device and adds a Room Control page to the Cisco Room Navigator, right alongside the source buttons. No separate touch panel, control processor, or remotes required.
- Turn lights on and off via the Lightware device's GPIO port, serial port or Ethernet commands.
- Control displays with power on/off, mute/unmute and a volume slider that uses the display's own volume control.
- Webex or Microsoft Teams Rooms: works with the Cisco codec in either mode.
- Ready-made display drivers for LG, Samsung and Sony, and a generic device for other models.
Wizard-Based Setup - No Coding Required
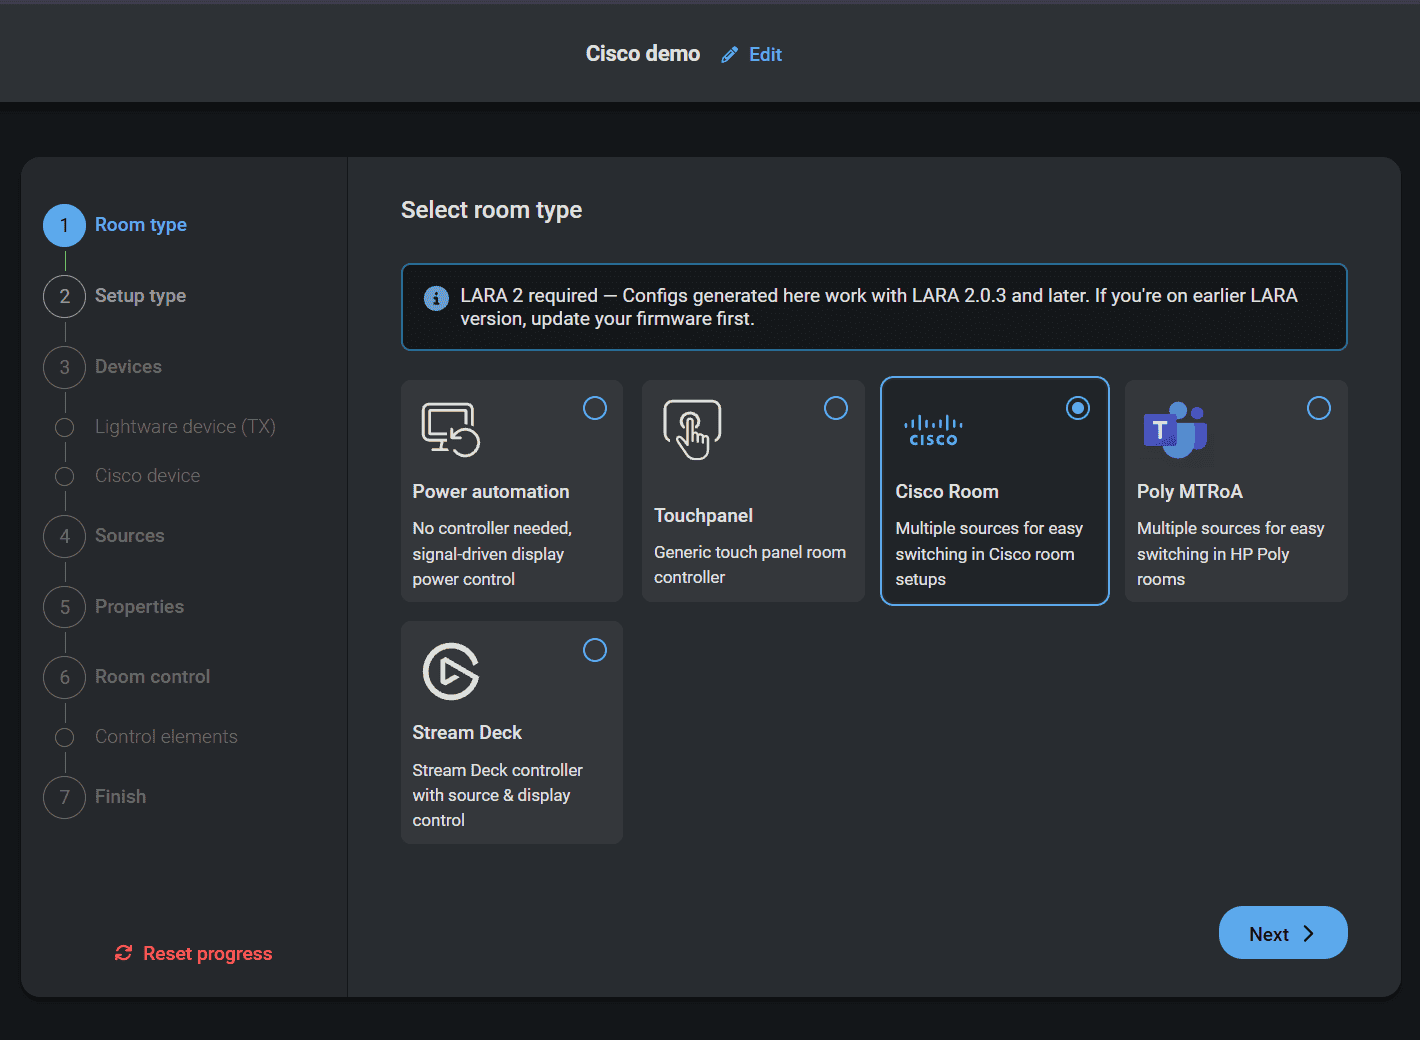
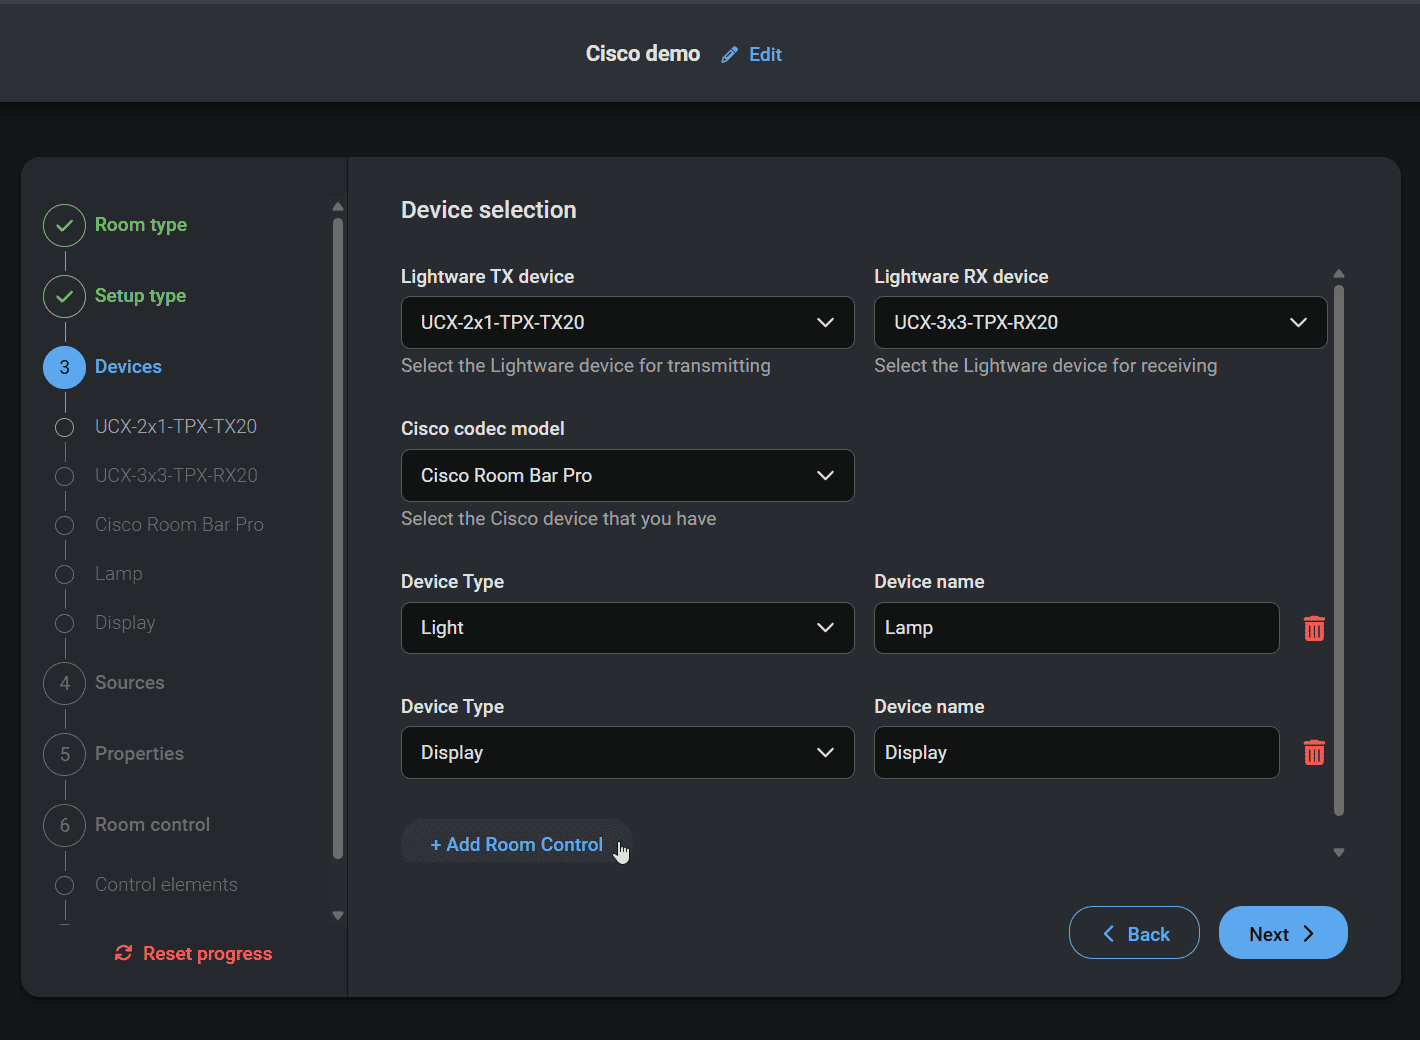
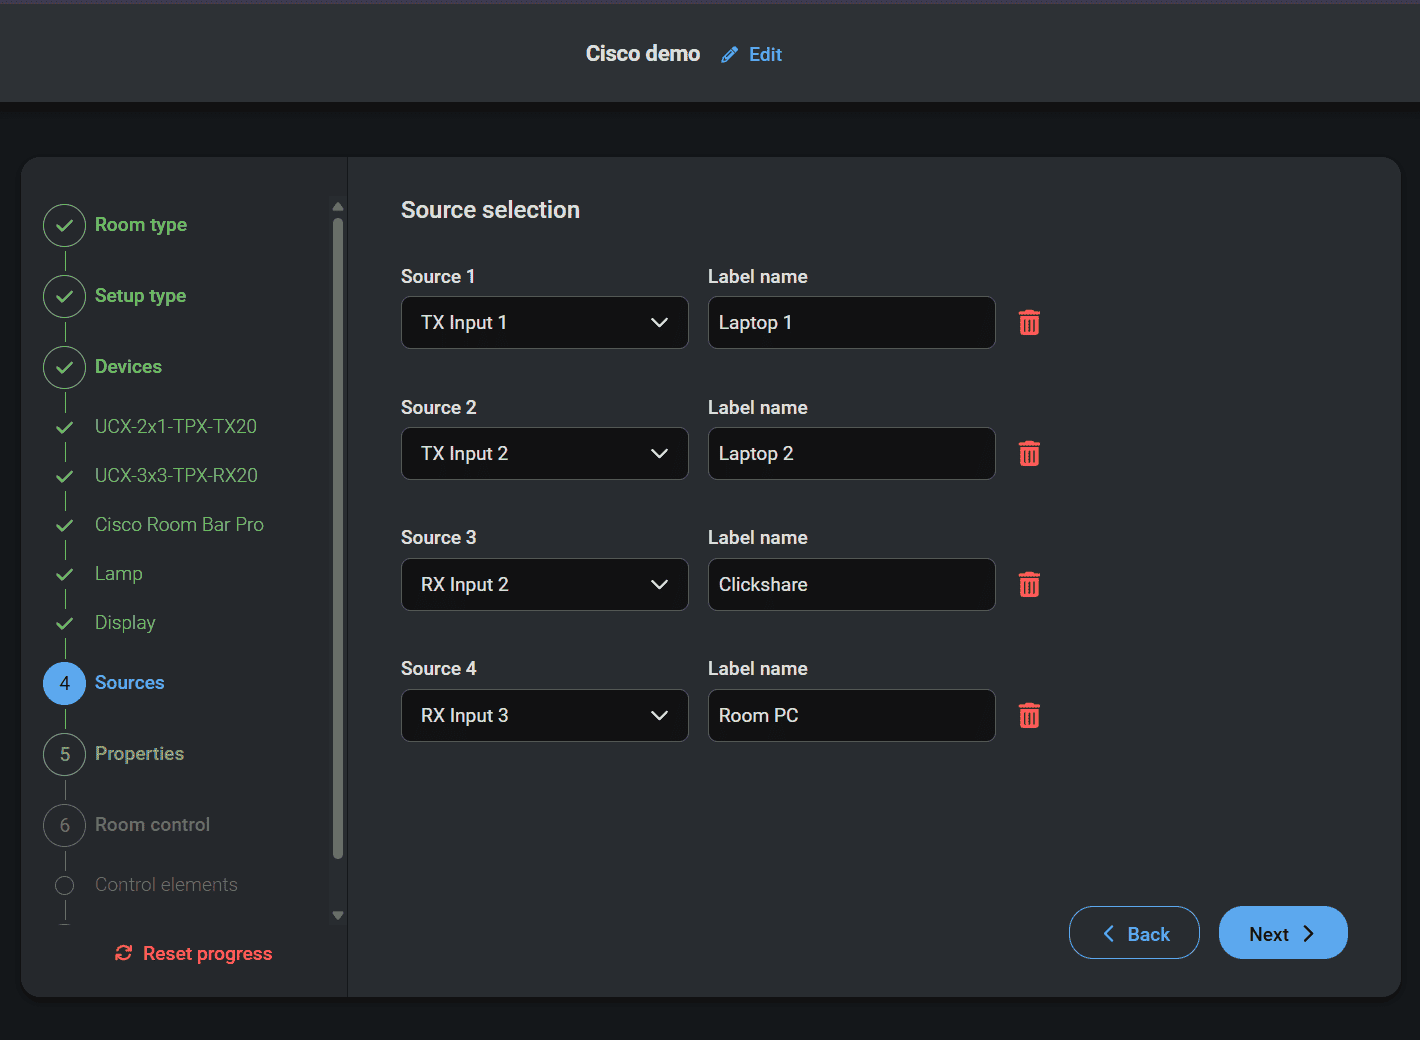
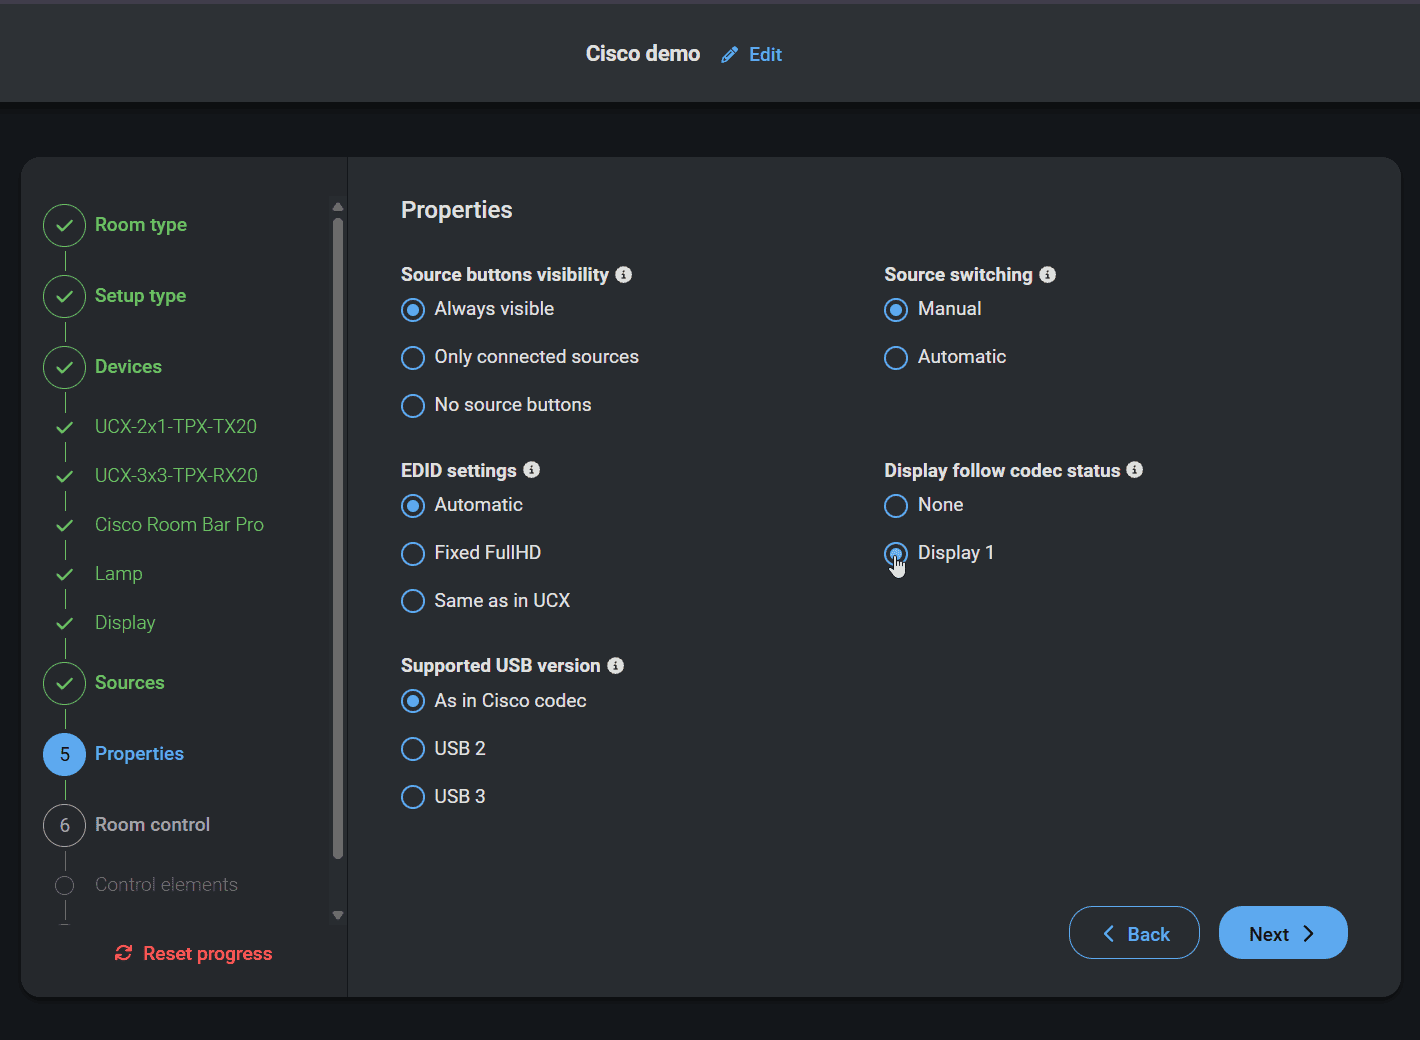
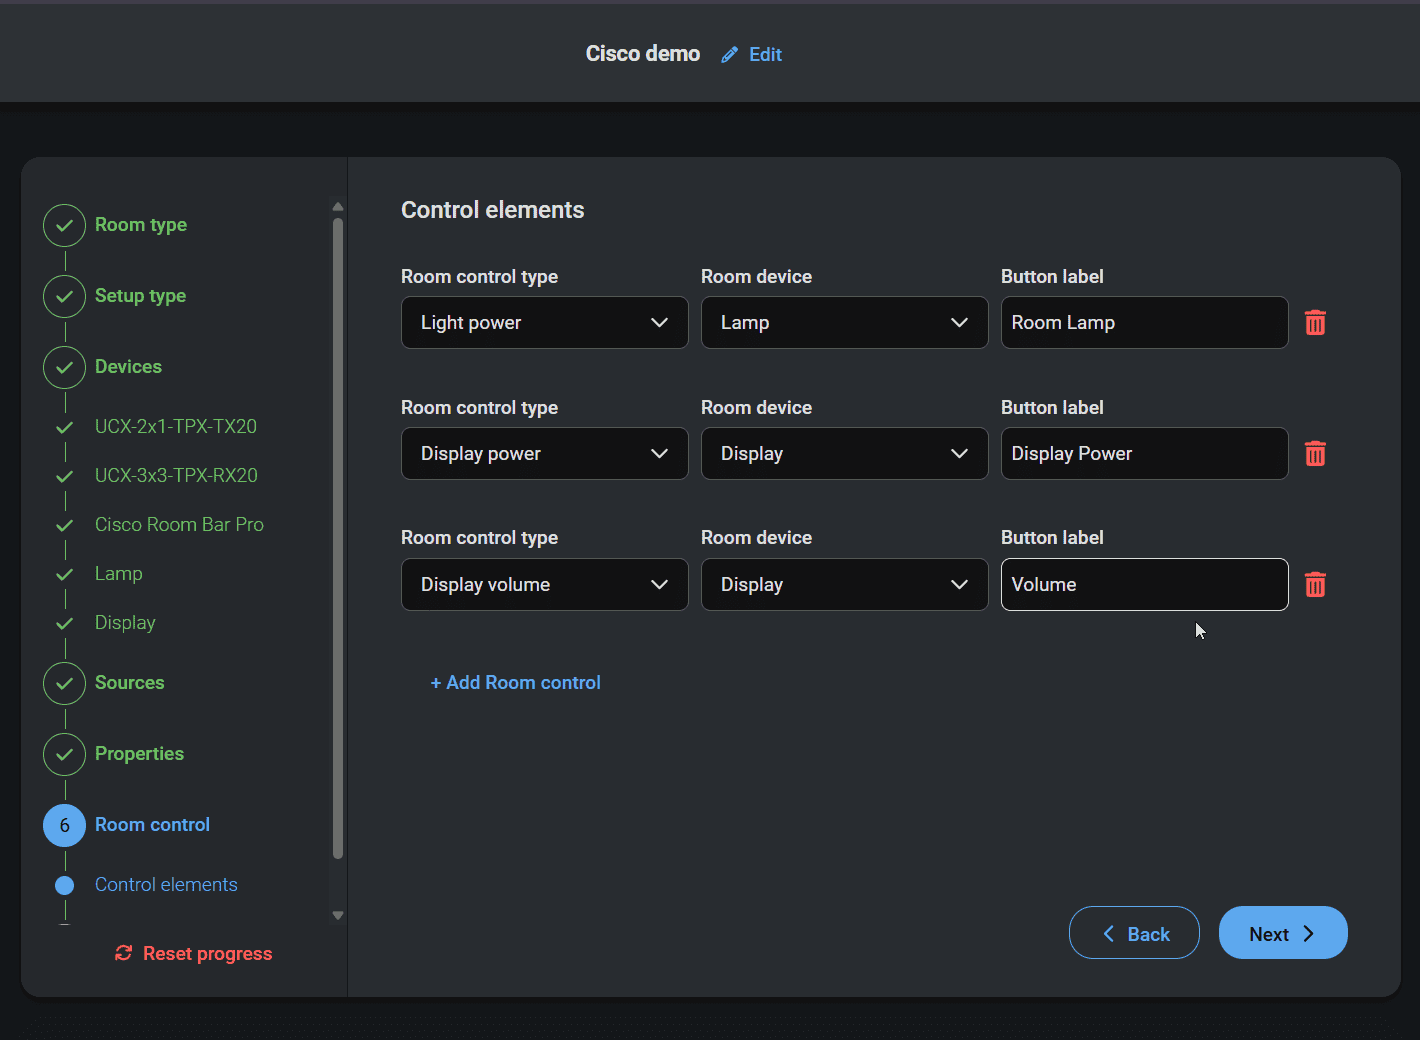
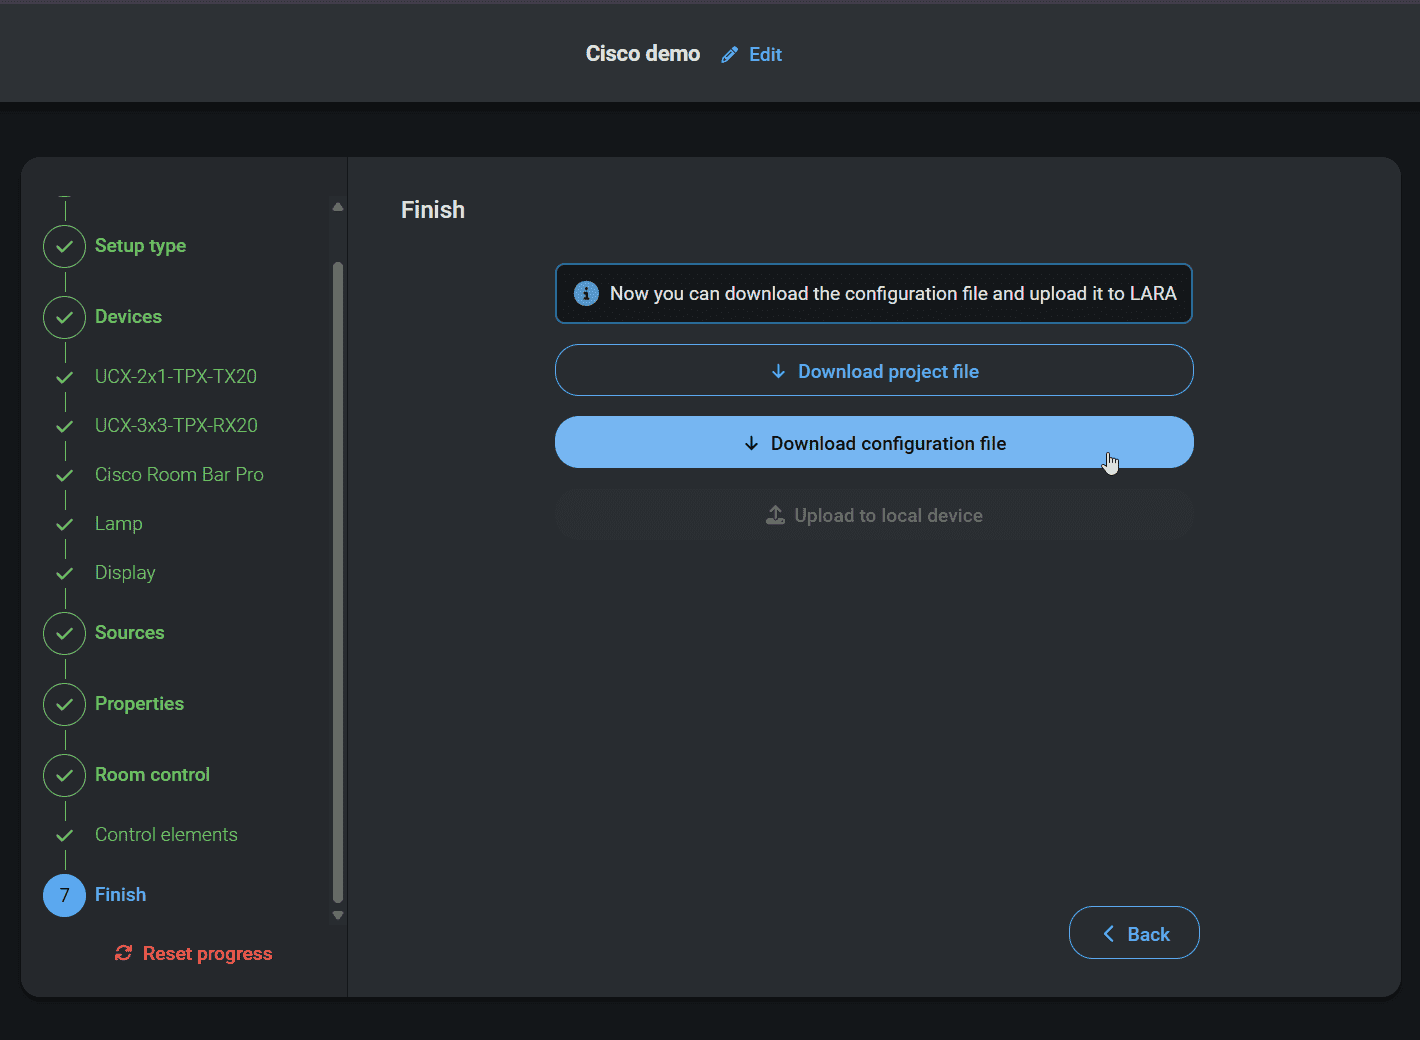
The installer builds the whole room in seven guided steps and downloads a configuration file to upload to the Lightware device. No modules to assemble and no code to write.
Start a project and choose Cisco Room.
Standalone, Simple Extender, or Extender with Local Switching.
The Lightware devices, the Cisco codec model, and the lights and displays to control.
Map the inputs to source buttons, with names people will recognise.
Manual or automatic switching, EDID and USB policy, and whether the display follows the codec.
Name and place the panel, choose its colour, and add up to six controls.
Download the configuration and upload it to LARA on the Lightware device.
Fits the Room's Wiring
Pick the setup that matches the room. Transmitter and receiver share one CAT6A cable of up to 100 m, which carries video, USB and control.
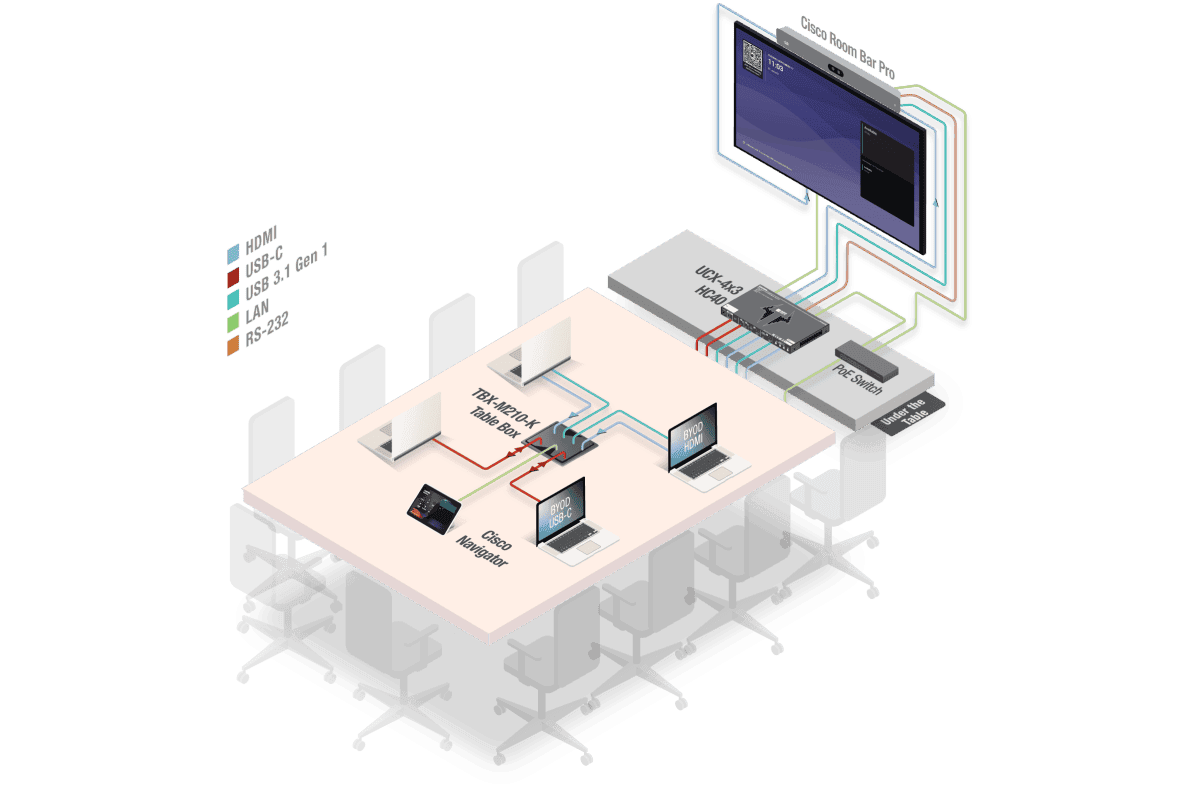
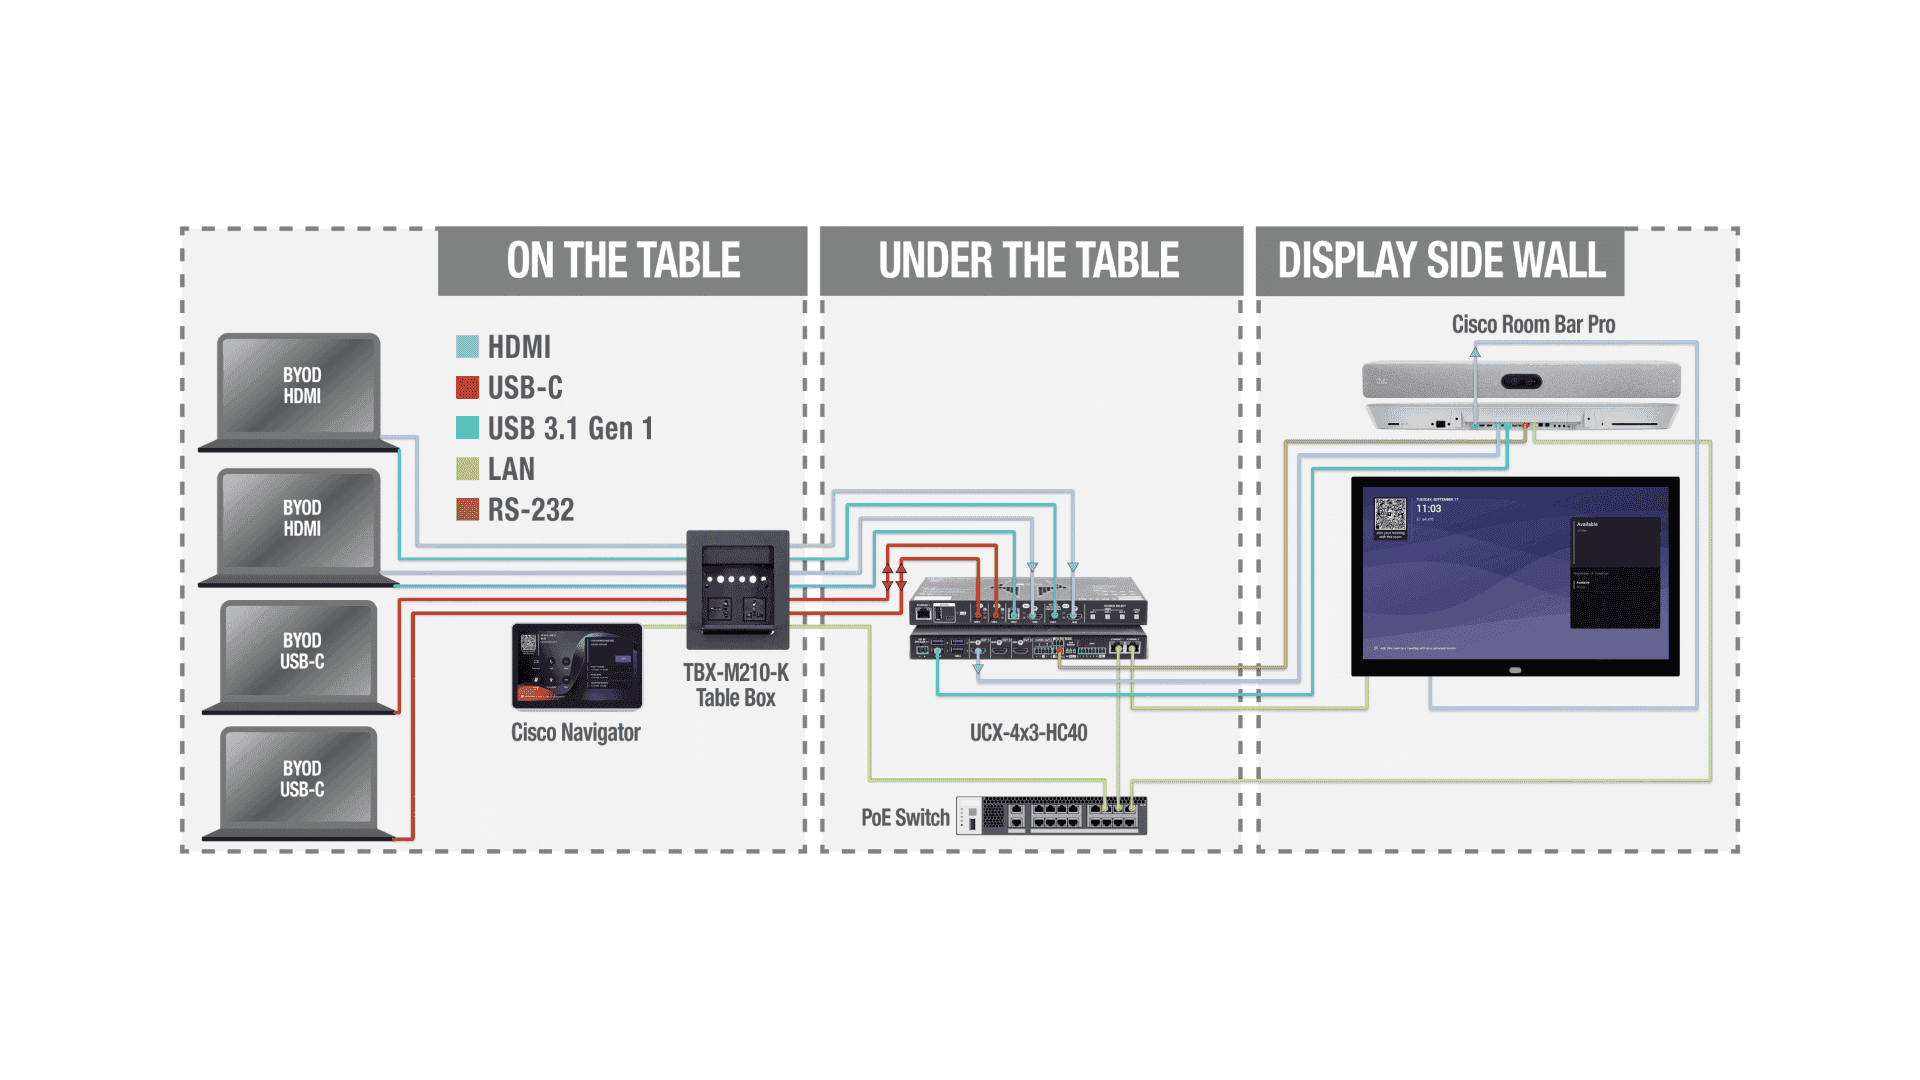
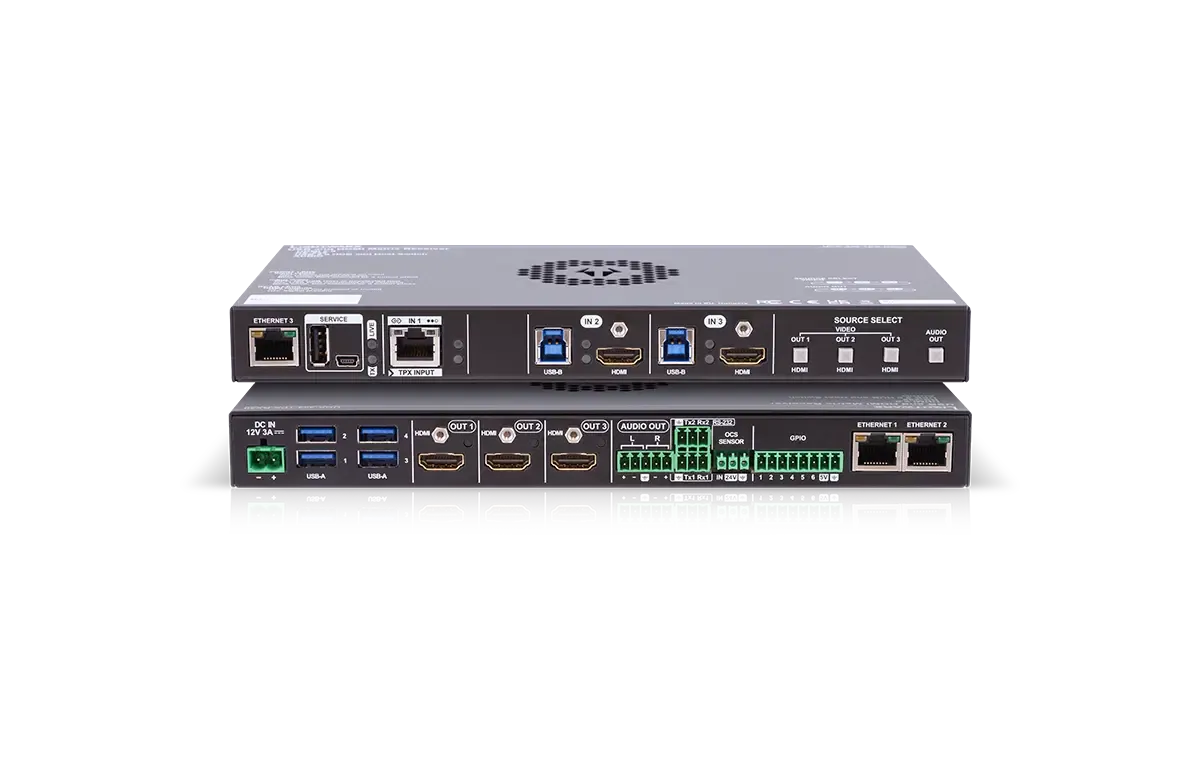
UCX-4×3-HC40 under the table, with a TBX-M210-K table box.
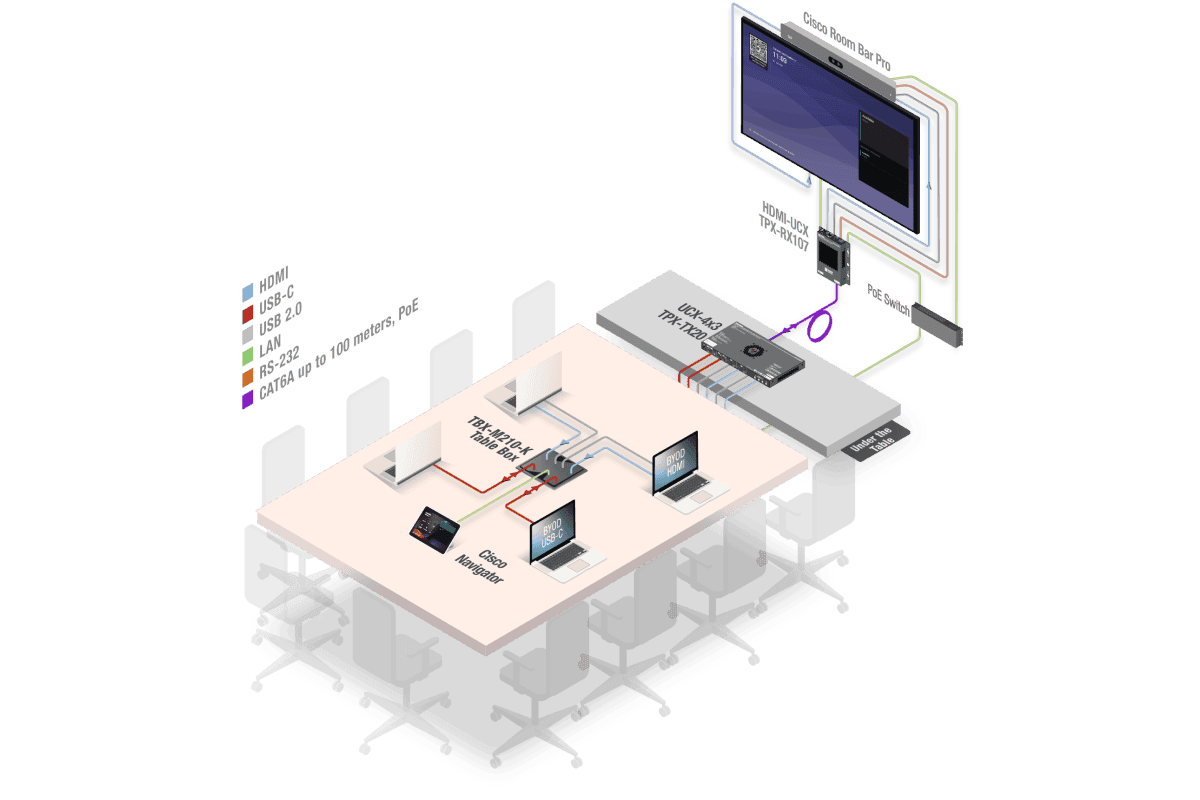
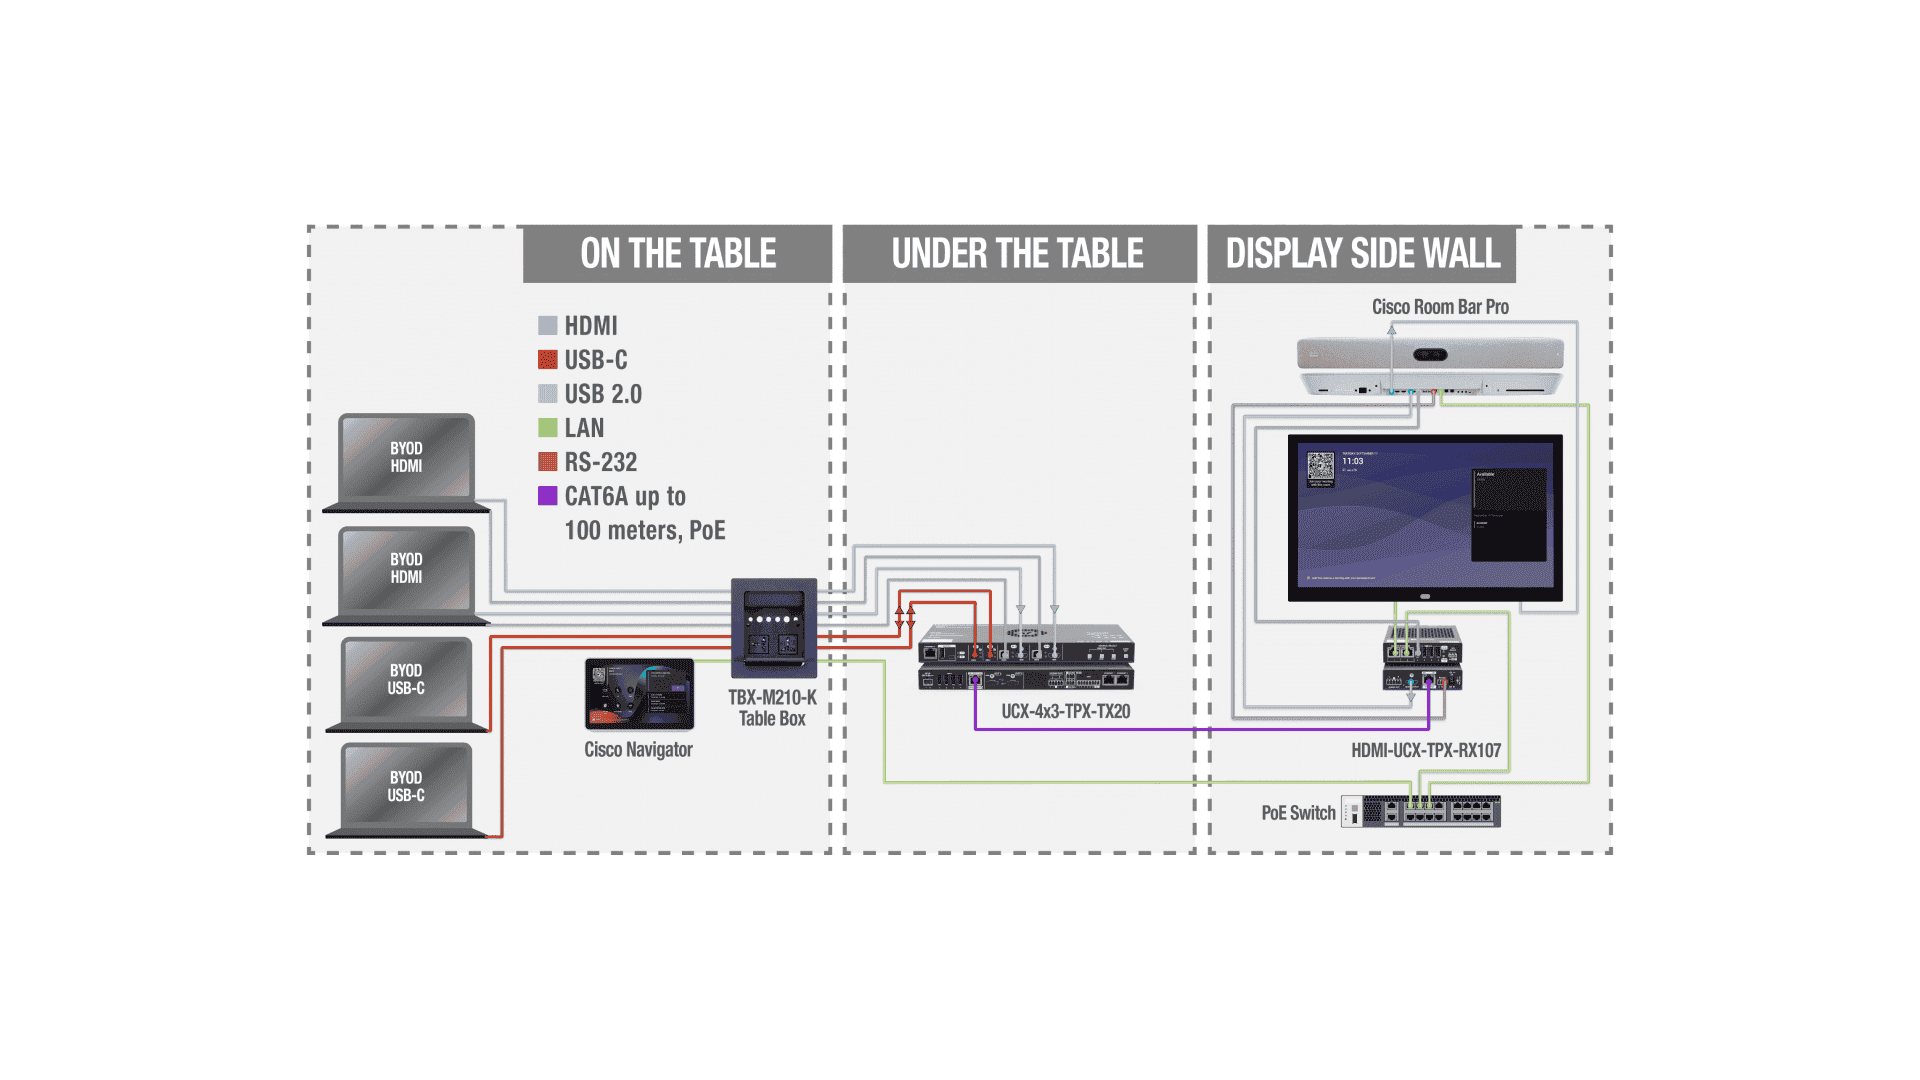
UCX-4×3-TPX-TX20 under the table, HDMI-UCX-TPX-RX107 at the display.
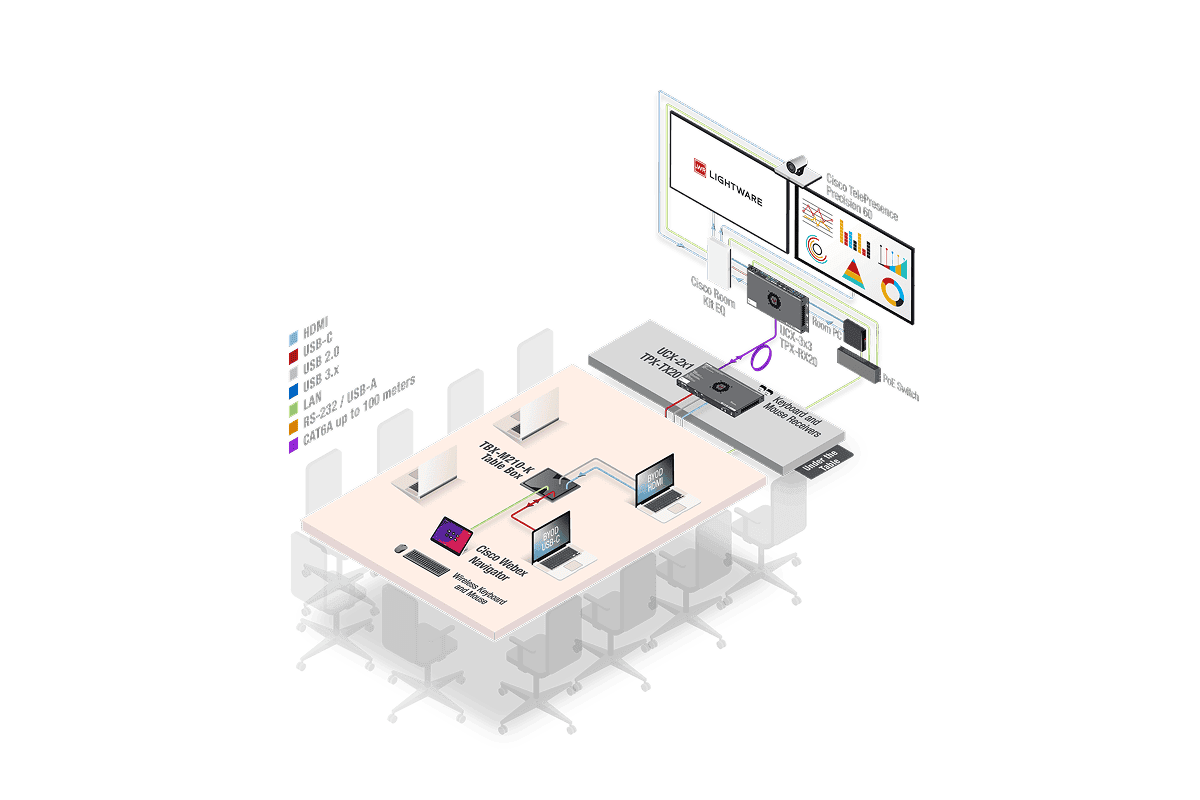
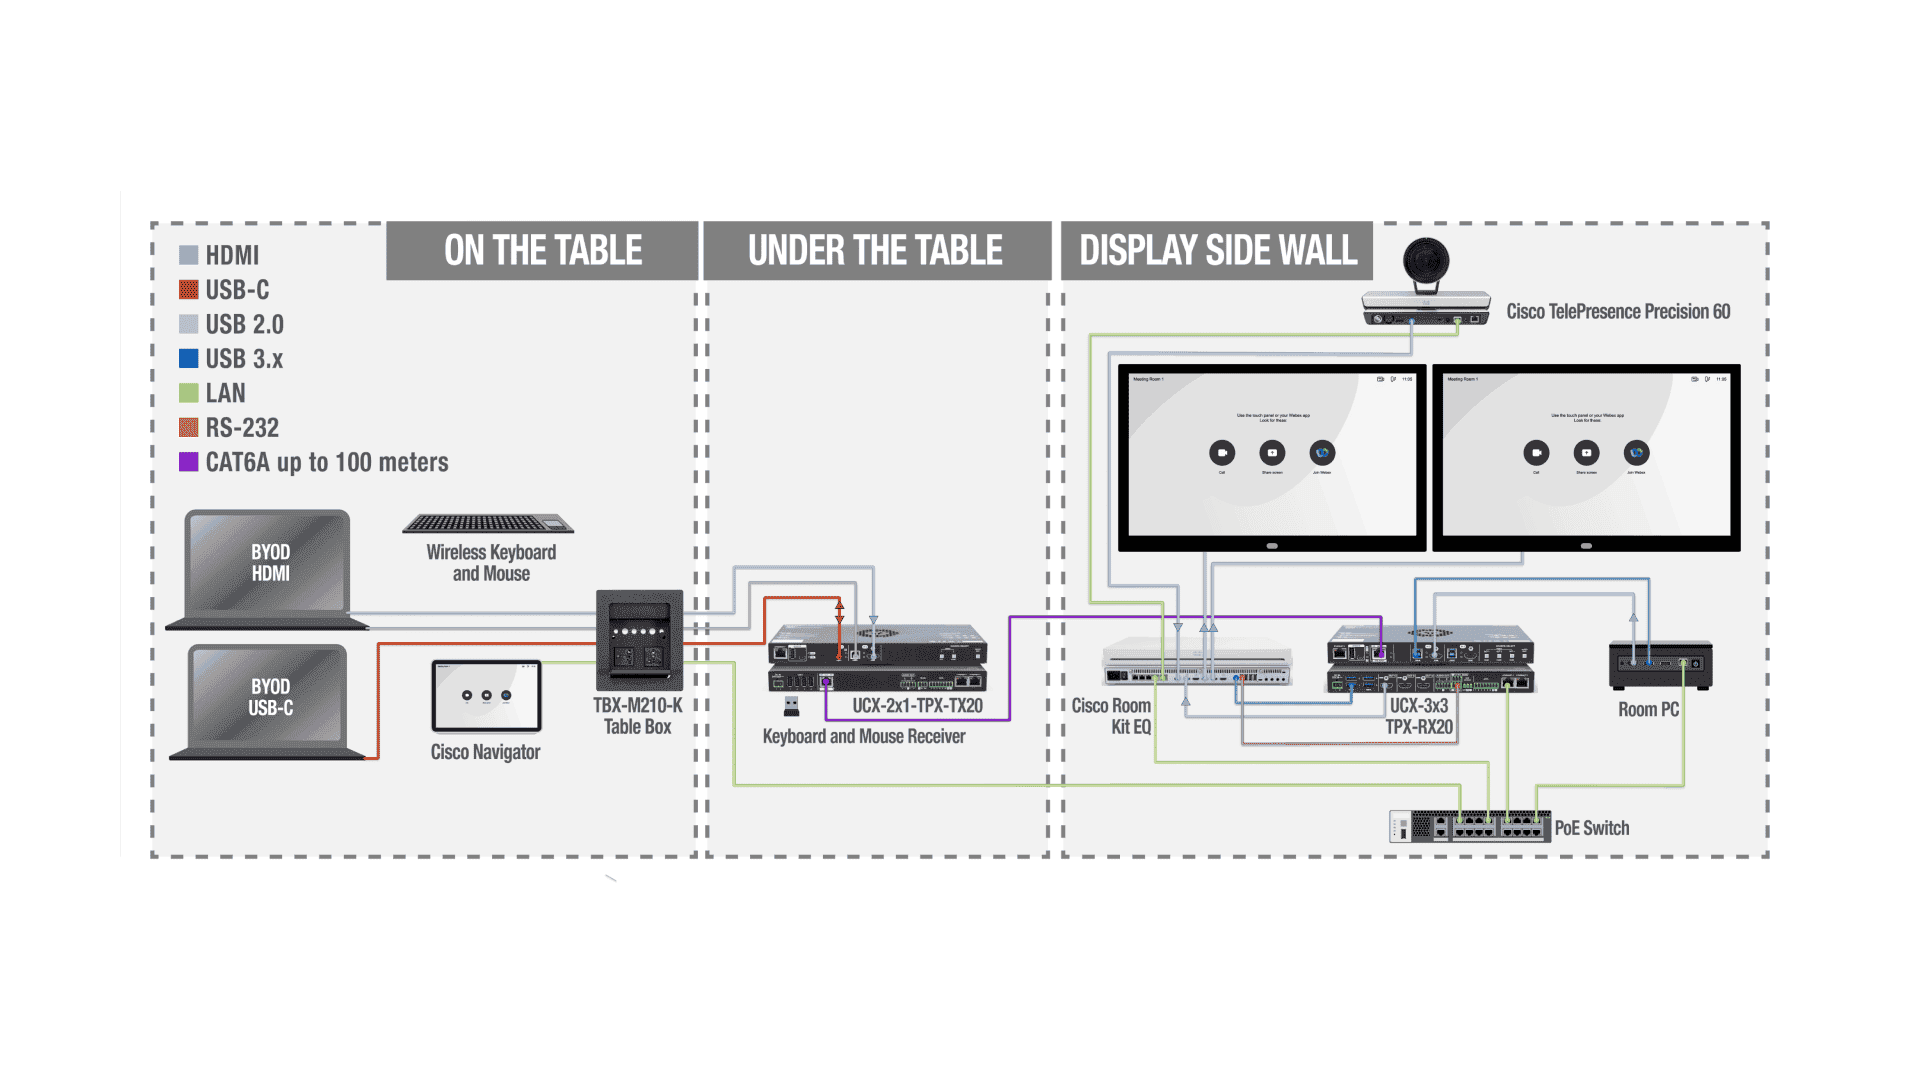
UCX-2×1-TPX-TX20 at the table, UCX-3×3-TPX-RX20 at the display.
Supported Lightware Devices
Requires LARA 2.0.3 or newer, activated on the host device.
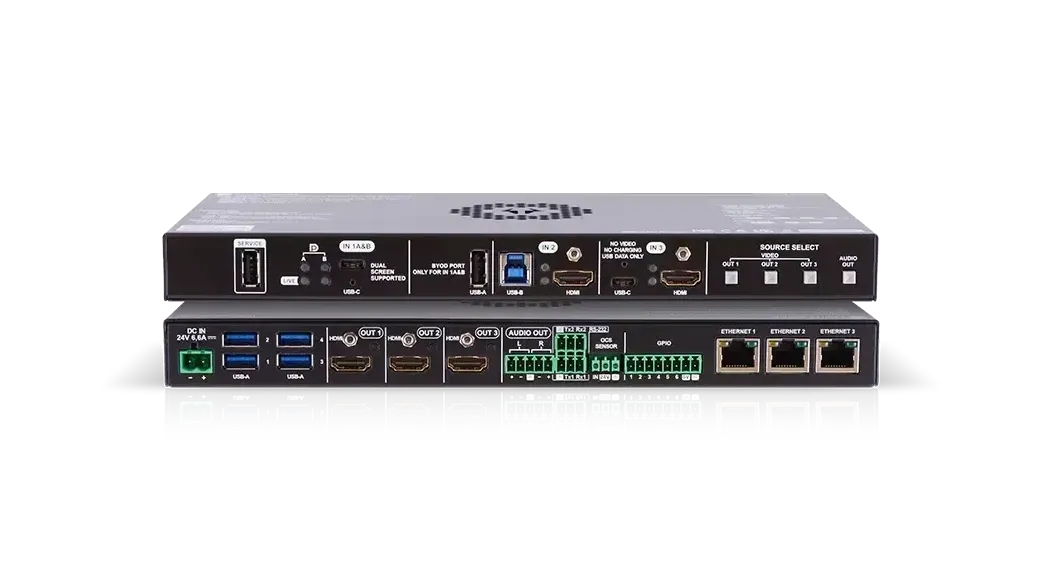
Taurus UCX Series
Taurus TPX Series
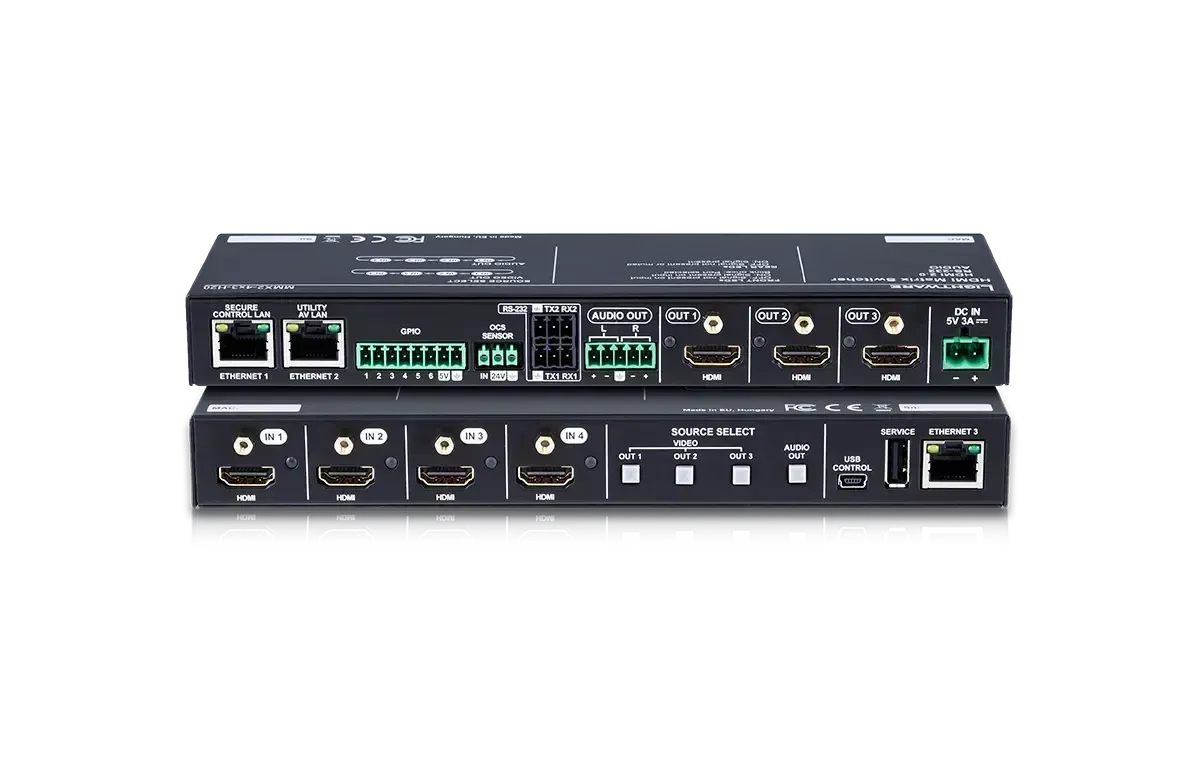
MMX2 Series
Start Using LARA Wizard
LARA Wizard guides you through the configuration and generates a LARA configuration file ready to upload to the Lightware device. No modules to assemble, and no code to write.

Writing Your Own LARA Logic Instead?
The Cisco Room Integration Suite gives you the same building blocks as separate LARA modules:
- Cisco Room Device Driver for xAPI control and Control Hub visibility
- Cisco Source Expansion for crosspoint switching from the Navigator
- Cisco Room Control for custom displays, lights, blinds and projectors
Related Training Materials
Codec Integrations (2026) - Level 1

Taurus Room Solutions
